Saturday, 7 June 2014

My Teriyaki Salmon with Thai Sticky Rice and Chilli Lime Broccoli

Last night I made a fairly quick teriyaki salmon dish because we fancied something full of flavour but fairly light and I always look to Asian food for this! I served it with some sticky Thai rice which went with it very well, though you could use noodles or even egg fried rice if you'd prefer. And to keep it zingy, I lightly fried my broccoli in chilli and lime juice. The perfect late Friday night meal after a long week at work that involves minimal prep, only about 15mins in front on the hob and whole lot of satisfaction at the table (or on your knee in front of Alan Carr!)


Ingredients 


1 tablespoon rice wine vinegar
2 tablespoons clear honey
3 tablespoons dark soy sauce
1 garlic clove, chopped
a chunk of ginger, chopped (about double the size of your garlic clove)
2 salmon fillets

oil (I used olive as it's all I had in, but preferably a none flavoured oil)
a handful of tender stem broccoli
1/2 - 1 chilli (depending on taste), chopped finely
1 lime

thai sticky rice
fresh coriander to garnish


Firstly marinate your salmon buy mixing together the vinegar, honey and soy sauce in a shallow bowl. Add the garlic and ginger (and don't worry about chopping these super finely as we will be sieving them out later). Then put your salmon in the bowl and coat all over. Cover with some cling film and leave in the fridge for a couple of hours or until you are ready to cook!


When you're getting hungry, preheat the grill to about 180degrees and cook the rice according to packet instructions. If you're doing Thai sticky rice then I always aim to have it cooked about 10minutes before I'm ready to serve so you can leave it in the hot pan with the lid on to get really really sticky first!

Take out your bowl of salmon, and roll the salmon in the marinade again so that it is all covered. Take the fillets out and put onto a baking tray, saving the left over marinade for your sauce later. Put into the preheated grill for about 10-15minutes, checking regularly. You want to be able to put a knife into the thickest part of the fillet and it to slide a flake out very easily, but don't overdo it and dry out the salmon - as soon as it is no longer rubbery then take it out!


As the rice and salmon are cooking, get a pan of water on the hob and boil (or steam if you have a steamer!) the broccoli for about 5 minutes or until just tender. Drain and put to the side for a moment.

Give the broccoli pan a quick rinse and add the left over marinade to heat for a few minutes until it thickens slightly. Squeeze in the juice of half a lime, saving a couple of wedges to garnish if you'd like. Don't worry if it doesn't look like much sauce - there is so much flavour in this that you won't need a lot!


Add a splash of oil to a frying pan and add your chopped chilli. Fry for a couple of minutes then add the broccoli. Squeeze in the juice of the remaining half a lime, and you're ready to serve!


Line up the rice, salmon fillet and broccoli on a plate, making sure you sprinkle all of the chilli over from your broccoli pan! Sieve the sauce into a jug so that you remove the chunks of garlic and ginger, then drizzle the sauce over the whole dish. Sprinkle with fresh coriander and add the lime wedge if using.


A really tasty dish, full of fresh, zingy flavours with just the right amount of stickiness to feel indulgent!! Enjoy!

Saturday, 24 May 2014

Italian Buffet Leftovers Three Ways

A couple of weeks ago I cooked an Italian Buffet for the girls (which mostly consisted of pizza!) and I had a fair few left over ingredients. There was a couple of chicken breasts left from the Chicken Pesto Pizza, some pasta salad, mushrooms, salsa (from the crisp dipping that always occurs on girls night!) and a few bits from the olive selection. So I decided to use these ingredients to feed me for the next week (just about!) and this is how I did it...


Leftovers 1

On the first day I basically bunged everything into a pan with some chopped tomatoes and a little balsamic and made a lovely rich, slightly spicy, tomato dish.

First off, chop a red onion and throw into the pan with a splash of oil (I actually just poured in the oil from the olive platter, so we already had some of those lovely flavours cooking away!)


Crush any left garlic from the olive platter and another clove for good measure, and stir into the onions. Then dice the chicken and add to the pan. Cook until all of the chicken is sealed, then add in the mushrooms, chopped.

As the mushrooms are starting to shrink, add the leftover salsa, a tin of chopped tomatoes, a dash of balsamic vinegar if you've got it, and some dried herbs. I can't honestly remember what I used but maybe something like basil and a little oregano would work well! Give it a good twist of salt and black pepper as well.

Simmer away then add the olives - chopped so that the flavour spreads throughout the dish. I included the chillies as well, but left out the stuffed peppers (I say left out - I actually ate them as I was cooking!!)


I would then leave with a lid part on for about 10minutes or so, making sure that the chicken is cooked through and has soaked up all of those yummy Italian flavours. But don't overdo it on day 1 as you'll be reheating this dish again!!

I served this with left over pasta salad, shredded iceberg lettuce, garlic bread and some grated parmesan over the top for good measure. Now tell me - does this look like a proper plate of leftovers or what?


Save the rest of the tomato chicken stew in the fridge - you'll need this again!

Then I popped the rest of the pasta salad in a tupperware, ready to take for a working lunch the next day!


Leftovers 2


The next evening I fancied rice instead, so I cooked a portion of rice according to packet instructions and heated up a portion of the tomato chicken. Served with some rocket and a little more balsamic - this was absolutely delicious!


Leftovers 3


The third variation on this dish was in a pasta bake. I cooked a couple of portions of pasta in a pan of boiling water until just underdone. Then mix in with the remaining tomato chicken and grate with a little parmesan. Bake in the oven for about 15minutes at 180degrees, or until the sauce is bubbling away and the chicken is heated through. This pasta bake then did the next night as well!


So there you have it - leftover ingredients from one meal, cooked in three different ways and lasting four dinners and a lunch! Not bad going really!


Monday, 5 May 2014

Italian Buffet with Friends!

Hello and welcome back! 

A huge thank you to everyone who has continued to check out my recipes and things, even though I've been blog-absent for far too long! I am so excited to say I now have a laptop again, so I plan to post weekly(ish) as before... And to kick it all off I thought I'd share a few super simple recipes that I made on Saturday night for the girls as a bit of an Italian Buffet Feast!


The recipes are for three different pizzas - Carbonara Pizza, Chicken Pesto Pizza and Pepperoni Pizza - and a Pasta Salad. The pizza recipes are my own, but the tasty pasta salad was taken from the handy little book, Everyday Pasta, published by Parragon 2009. Served with a basic green salad, some mixed olives and a ton of garlic bread, this buffet worked a treat (though I had to take the photo of the table before adding everything to it because the girls were dying to tuck in!) It made a wonderfully easy meal as it can nearly all be prepped in advance, so it's perfect if you don't want to miss out on any of the catch up! Admittedly a carb heavy buffet but undeniably tasty with a glass or two of a good Pinot and some lovely company.


Carbonara Pizza

pack of pizza base mix (for an 8" pizza)
1/2 cup of double cream
1 medium egg
black pepper
olive oil
1/2 red onion, sliced
a couple of handfuls of mushrooms, sliced
parmesan cheese
a few pieces of parma ham
a couple of handfuls of rocket (optional)
balsamic syrup (optional)

Make the pizza base according to packet instructions, but make sure to roll is out really nice and thin to get a lovely crispy base (mine was much bigger than the suggested 8"). Leave it to rise slightly on a piece of baking paper while you prepare the topping.

Whisk together the cream and egg. Add a good twist of black pepper and leave to the side for a moment.

Heat a splash of olive oil in a frying pan over a medium heat and add the onion. Fry for a couple of minutes then add the mushrooms for a further minute (these will be cooked in the oven so don't overdue them at this stage). Add the cream mixture to the pan and grate in as much parmesan as you want! Give it a quick mix around then empty back into your jug or bowl to cool.

When you're nearly ready to serve your pizza then preheat the oven to about 220 degrees. Spread the cream mixture over your base and rip over the parma ham. Grate a little more parmesan over the top and pop in the preheated oven for about 10 minutes or until the topping is turning golden and the edges are just starting to crisp up.

If using, then scatter rocket over your cooked pizza and drizzle with balsamic syrup. Enjoy!


Chicken Pesto Pizza

pack of pizza base mix (for an 8" pizza)
2 tablespoons of basil pesto (I used shop bought to save on time but if you can be bothered to make your own then definitely do!)
olive oil
2 chicken breasts, baked in the oven for about 30mins wrapped loosely in silver foil then sliced (or buy some ready cooked)
1 small courgette, grated
a handful of pine nuts
about 1/2 – 1 ball of mozzarella, depending on how cheesy you'd like it!
parmesan cheese

See above for making your base then preheat the oven to about 220degrees when you're ready to cook pizza. Spread the pesto evenly over the base and drizzle with a little olive oil, mixing it around on the pizza to thin the pesto slightly.

Spread over your cooked chicken pieces, grated courgette and pine nuts. Rip the mozzarella into small pieces and scatter over the top. Grate with a little parmesan then pop in the oven for about 10 minutes or until all of the cheese is melted.

Yummy!


Pepperoni Pizza


pack of pizza base mix (for an 8" pizza)
about two tablespoons tomato purée
about a tablespoon of water
olive oil
1 garlic clove, crushed
1 teaspoon of herbs (try basil and oregano if you've got them!)
salt and black pepper
a selection of pepperoni pieces
1/2 red onion, sliced
1 red pepper, sliced
1 ball of mozzarella


Make your pizza base as above, then preheat your oven to 220degrees when ready.

Mix together the tomato purée, water, a dash of olive oil, garlic, herbs and a good twist of salt and pepper. Spread this evenly over your base, then scatter the pepperoni, onion and pepper pieces. Finish by ripping mozzarella into small pieces and spreading around.

Cook in the oven for about 10 minutes or until the cheese is bubbling away, then serve!


Pasta Salad

As I mentioned earlier, this recipe is not my own - it was taken from the Everyday Pasta book, published by Parragon, and adapted for this buffet. The recipe asks for parmesan but I figured that the feast was already so cheesy that I'd leave it out, and it is also meant to be served warm (called Warm Pasta Salad in the book!) but I prepared earlier in the day and served cold. I've also changed the quantities to match my haphazard way of cooking - but seriously, who measures out pasta to the gram?!

2 or 3 handfuls of dried farfalle or other pasta shades
6 pieces of sun-dried tomato in oil, drained and chopped
4 spring onions, chopped
a handful of rocket, chopped
1/2 cucumber, deseeded and diced
2 tablespoons of parmesan cheese, grated (optional)

4 tablespoons olive oil
a good pinch of caster sugar
1 tablespoon white wine vinegar
1 teaspoon Dijon mustard
salt and pepper
a few fresh basil leaves, finely chopped (or a teaspoon of dried if you forgot to pick it up like me!)

Make the dressing first by whisking the liquids together. Season with salt and pepper and add the basil.

Cook the pasta according to packet instructions, then drain and toss in the dressing.

If serving warm, then add the remaining ingredients and sprinkle with parmesan cheese (if using) now. If serving cold later then I'd recommend waiting to add your salad once the pasta has cooled to avoid the leaves becoming soggy.


And there you have it! A carb heavy, but satisfyingly simple Italian buffet... crack open a bottle of Pinot and enjoy with friends next weekend!

Sunday, 9 March 2014

A Manly Steak Dinner!


First of all, I want to apologise for my lack of blogging over the last few weeks -I'm a total idiot and fell asleep with my laptop on my bed... it fell off and has completely broke. I even got a techy friend to have a look and it seems it cannot be fixed so I am currently laptopless and will have to sneak in a quick blog whenever I get chance on someone else's! So frustrating because I've got sooo much to share with you!
Anyway, I'm currently blogging from my boyfriend's laptop and so I thought it would be fitting to share the recipe for the manly steak dinner I cooked him a couple of weeks ago!
 
serves 2


Ingredients

2 steaks (I can't honestly remember what cut we had but I would say try get it from a butchers and pick your favourite!)
salt and black pepper
olive oil
1 large sweet potato, chopped into wedges with the skin left on
about a teaspoon of paprika
a sprinkle of cayenne pepper (if you'd a bit of a kick!)
a handful of breadcrumbs (throw a couple of nearly stale slices in a blender)
1 clove of garlic, crushed
a sprig of thyme
a handful of grated parmesan
6 small portabella mushrooms
1/2 onion, chopped finely
about 150ml single cream

Preheat the oven to 200degrees. Get your steak out of the fridge and season both sides with salt and pepper, pressing it in with your fingers to massage the meat a little. Leave to one side.
 
Lay the sweet potato wedges on a baking tray, and coat in the paprika and cayenne pepper if using. Season with salt and pepper and drizzle with olive oil. Mix the potatoes around the tray to ensure everything is coated evenly, then put in the oven for at least half an hour - if you want them soft then this will be enough, if you want blackened corners and a bit more of a crunch then leave in for another 10mins or so. Make sure you mix them around again about half way through cooking.
 
Put a griddle pan (or heavy bottomed pan) on the hob on a high heat and leave to become very hot.

Remove the thyme leaves from the stalk and mix together in a bowl with the breadcrumbs, garlic and half of the parmesan. Cut the stalks of your mushrooms and if you don't want to throw them away, then chop finely and add to the breadcrumb mix. Spoon the mixture into your mushrooms and place on a baking tray. Drizzle with olive oil, then put in the oven for about 10mins, or until slightly crispy on the top.

Add some olive oil to a frying pan and gently fry the onions.

Put your steak onto the griddle pan and leave for a couple of minutes on one side, before turning over and cooking the other side. Once sealed all over then take off the heat and leave to rest for a few minutes before serving. I'm not going to go into detail on this because I'm not the world's greatest steak cooker and we like it fairly rare which will not be to everyone's taste... But just don't overdo it!

 
Once the onions are turning soft and golden, then add the cream and parmesan and a good twist of black pepper. You can also mix into the sauce the juices that have run out of your resting steak.

Serve your lovely rustic sweet potato wedges, flavourful stuffed mushrooms and steak onto plates, and dollop on the sauce in a manly fashion. Pop a couple of beers on the table and enjoy!


Monday, 10 February 2014

Nick 'n' Mix Cake

This weekend I popped up to Birmingham for a friend's birthday, a friend that just happens to love all things sweet, particularly the childhood favourite pic 'n' mix!

So a friend and I spent Saturday making this cake for him based on a very basic (but pretty damn good!) Victoria sponge recipe adapted from the Love Food Cakes book (published by Parragon Books) and some decorating inspiration from Google images! This little cake book is perfect if, like me, you aren't a brilliant baker but every now and again need a simple recipe for a tasty cake that you can't get too wrong
 

So anyway, we made this hilarious cake which went down a treat, and as the birthday boy is called Nick, another friend then came up with a fantastic name for it... the 'Nick 'n' Mix' Cake!


Ingredients


350g plain flour
2 tbsp baking powder
350g unsalted butter, softened
350g caster sugar
6 eggs, beaten
2 tsp vanilla essence
a little milk if necessary

To decorate
strawberry jam
butter
icing sugar
ready to roll icing (enough to cover the cake)
a pack of flat strawberry strips
a large cup of pic 'n' mix
writing icing


Preheat the oven to 180 degrees. Grease two rectangle cake tins (the recipe is for two 8inch round tins but I've doubled it for this cake, so if the long side of your tin is about 8-12inch then it should be about right) and line with baking paper.

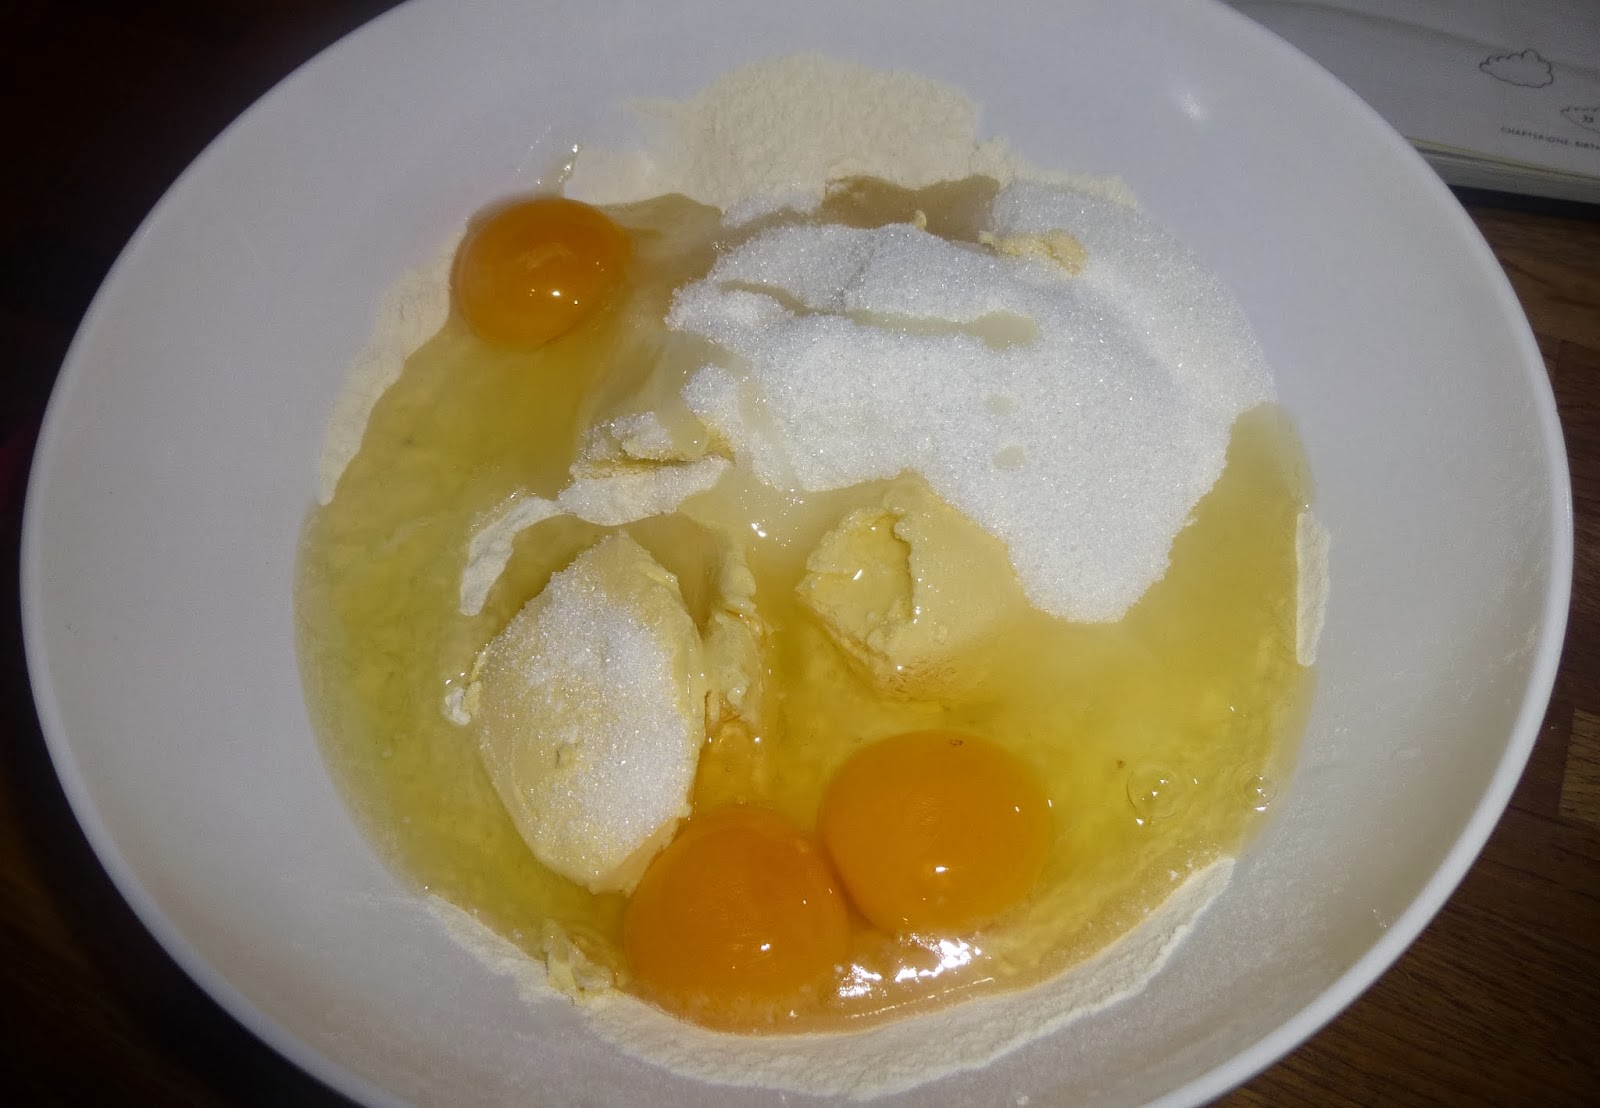
Sift the flour and baking powder then add all of your cake ingredients and beat until completely smooth (much easier with an electric beater!). I would advise that you do this by adding your ingredients a bit at a time unless you have a huge bowl as we got in a real mess... like splattered cake mixture on the other side of the kitchen kind of mess!! If the mixture is a little thick then add a few drops of milk, but we didn't need to.

Then divide between the two cake tins and bake for about 30-40mins or until risen, firm and golden brown (we had to cook ours for over an hour because I only had one tin and not enough time - any baker will tell you this is not how to cook a cake - but it did work alright so its up to you!) However you do it, just make sure that you can stick a knife in the middle and it comes out clean, then you'll know it's cooked through. Leave the cake/s to cool on a wire rack.

While the cake is cooling you can make your butter icing - I haven't given any quantities because I just keep mixing the icing sugar into a dollop of butter until it tastes good, but most icing sugar boxes will give the quantities. Add a couple of drops of vanilla essence while you are still mixing.

Once cool then use a bread knife to carefully saw through the middle of the cake (if you've done one big one) and to cut off the dome of the cake - you are aiming for a completely flat surface on the top of both halves. You also want to cut the sides of the cake at a slight diagonal, so that one half of the cake (the top end of the bag) is wider than the bottom.

Thinly coat one of the halves with jam and the other with butter cream, then pop one on top of the other. If you've made enough butter cream then coat the cake in a thin layer to stick the icing.

Next roll our your icing and drape over the cake. Fold in the bottom for a paper bag effect, then cut all the way round three sides with a pizza cutter or sharp knife, leaving an overhang on the top end of the cake (the wider end). We also used a pair of scissors to get the zigzag effect along the top edge.

Heat up a bit of jam then spread a thin layer along one side of your strawberry strips to stick them to the cake in stripes.

Roll out another little bit of icing to write on, cut into an oval shape and stick this on top of the stripes. Finally, pour out your pic 'n' mix and stack up next to the cake, making sure that the icing bag goes around the top of the pile. Then pop in the candles and get singing!!


Wednesday, 5 February 2014

A really very tasty (and also kind of healthy) lamb kebab!

I just made a totally yummy sort of lamb kebab for dinner and it was SO BLOODY GOOD that I'm blogging it before I forget exactly what I did! Unfortunately, I can't take all the credit because it was inspired by Jamie - I was watching his money saving meals thing the other day and he did a kebab that is probably EVEN BETTER than this one so you may as well search for that instead - but I've made this my way and it's probably a little simpler than his and kind of healthy too!

As I've just cooked this for me with left overs in the fridge for tomorrow, this recipe is for two, but everything in it is so easy to double or triple in quantity and I think it would be a brilliant help-yourself-around-a-table/finger-food dinner to make for friends!

For the kebab
2 flame baked chapattis (or whatever kind of flat bread type thing you can find!) 
about 250g/half a standard supermarket pack of lean lamb mince (we're not cooking in any fat so if you get a good quality mince then it really is pretty healthy!)
a tea spoon of garam masala (or a combination of warming spices, like cumin and coriander)
salt and black pepper

For the tasty bits
1/2 white cabbage, sliced finely
1/2 red onion, sliced finely
a couple of glugs of white wine vinegar
a tea spoon of sugar

about 250g/half a pot of low fat natural yoghurt
a handful of fresh mint, chopped
juice from 1/2 lemon
1 tiny garlic clove, chopped finely/crushed (or a bit of garlic powder if you prefer)
salt

For the extras
a red chilli, chopped
a handful of fresh coriander, roughly chopped
1/4 cucumber, sliced
a handful or two of sweet gem lettuce, chopped

Preheat the oven to about 180 degrees and pop in your flat breads. Cook these according to packet instructions and make sure they're not piping hot when you serve up because you're going to want to be able to pick them up!


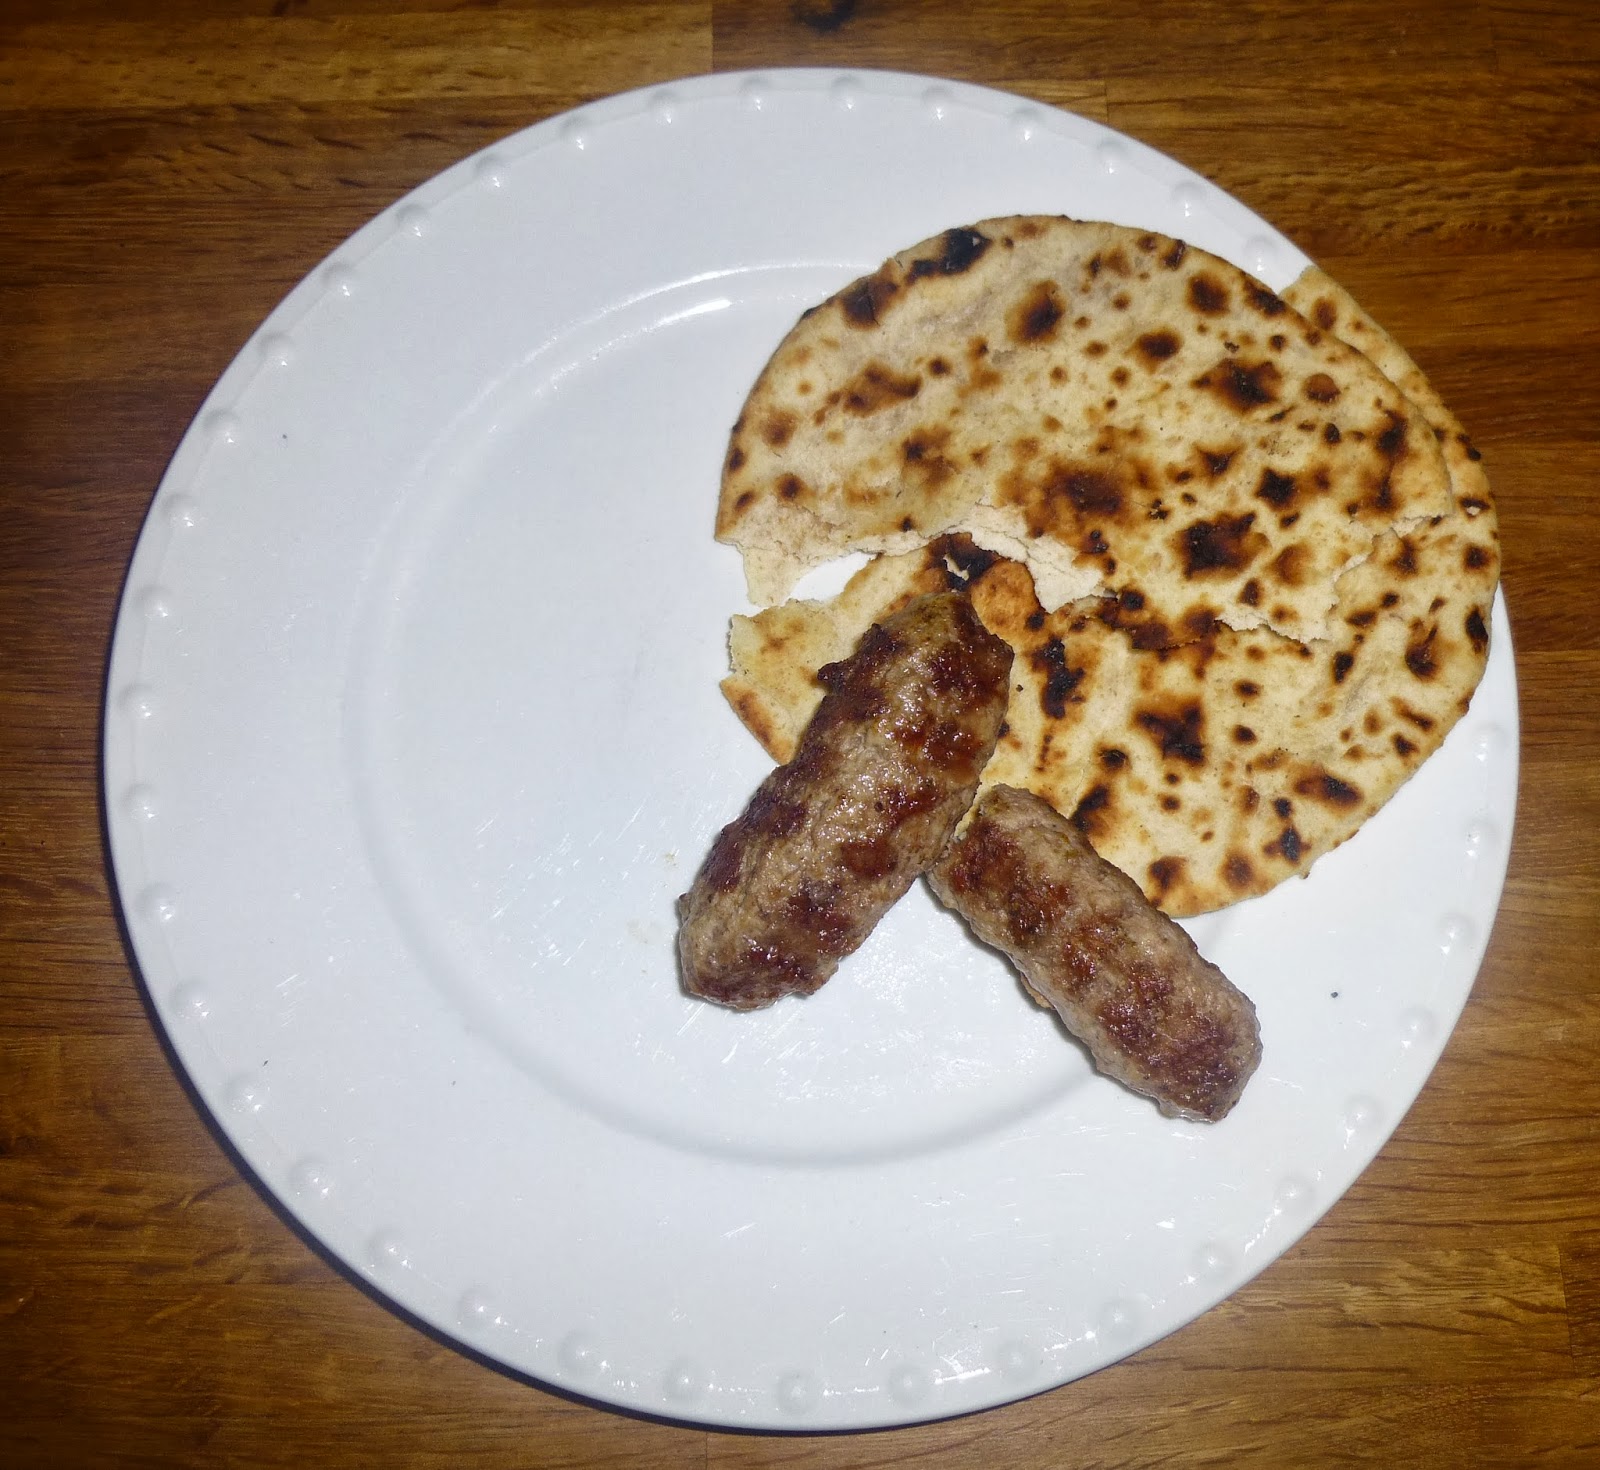
To make your kebabs you literally need to mix the spices and a good few twists of salt and pepper into the mince with your hands. Then split into four and roll each one into a kind of sausage shape - there's no need for it to be neat! If you've got some skewers then wrap the sausages around them, but I didn't bother and they still worked brilliantly (they'd be dead good barbequed but we've only just hit Feb so I think that might be a bit ambitious!)


Then get a griddle pan over a medium-high heat and pop the kebab straight onto it. Leave for several minutes on one side before turning - you're aiming for it to almost blacken with the fats inside the meat just sizzling away on the pan - and then turn until the whole sausage has been cooked. Remove onto a piece of kitchen roll to soak up any excess fats and then these are good to go - I made all of the other bits and bobs while the kebabs were cooking so the meal literally only took as long to make as these tiny sausages took to cook!

So while the lamb is on the hob, mix together the cabbage, red onion, white wine vinegar and sugar in a bowl and scrunch all together. The quantities here are too much for two people but this should keep pretty well so you could use it in another meal later in the week! In another bowl mix together the yoghurt, mint, lemon, garlic and a couple of twists of salt.

Make sure you've got all of the extras prepped and then dish up! I don't think there is a good way to eat this but I went with one hand and one fork and it went down pretty well...


Enjoy! No, seriously, you are really going to enjoy this!!


Sunday, 2 February 2014

Ridiculously Tasty Pizza!


One of my favourite memories of birthday parties as a child was making our own pizzas... Mum used to buy a selection of toppings, a load of cheese, some pizza bases and tomato puree or BBQ sauce, and we'd all pick our favourite bits and make our own pizza. So the other day when I was wandering down the supermarket aisle and saw some pizza bases I just thought it would be nice to do it again!


I then decided to get a pizza mix, instead of a base, so that I could roll it out nice and thin to get a gorgeous Italian style base. Then I bought a load of different toppings and put them on with a pesto base... easy and ridiculously tasty!

Ingredients


pizza base mix
1 tablespoon green pesto
1 tablespoon sour cream
1/2 red pepper, sliced
1/2 red onion, sliced thinly
a small handful of walnuts, chopped (optional)
1 chicken breast, cooked and ripped into pieces
a few pieces of chorizo or salami
parmesan shavings
a handful of mixed green leaves (or just go for some rocket)
balsamic syrup


Mix the pesto and sour cream together (you might want to double the quantities if you're pizza is quite large).


Mix your pizza base according to packet instructions and roll out nice and thin. Pop it onto a piece of baking paper on a tray, then coat thinly all over with your pesto mix.


Build up your pizza with all of the toppings (except the leaves and balsamic). The order doesn't really matter but I would probably go veggie stuff at the bottom, then meat and finally scatter the cheese over.

Then pop in the oven for about 10 minutes, or until the base is lovely and crispy and the cheese is bubbling away.


Add the leaves and a drizzle of balsamic - a pizza and salad in one! Then serve it up with a glass of cold white wine (still on the baking paper if you fancy a rustic style dinner), cut it into pieces and dig in with your fingers!

Yum!!

Monday, 27 January 2014

A quick potato salad recipe!

This is just a quick post because I was so chuffed with my potato salad that I had for lunch today - made out of the left overs in my fridge last night - that I wanted to share the recipe! Unfortunately I have no photos except a terrible one of the second half of the salad in it's Tupperware ready for tomorrow's lunch! But seriously, this is a real easy, really tasty potato salad that you can make the night before a miserable Monday morning to cheer you up later in the day - and it really did put a smile on my face at lunchtime!


So here we go... quantities are vague as ever - makes about two portions - but you can really just use up left overs for this recipe!

Ingredients


a couple of handfuls of small potatoes (or chop up a couple of bigger potatoes!)
about 100ml sour cream
a splash of white wine vinegar
generous twist of salt and black pepper
a handful of fresh dill, chopped finely (or just use about a teaspoon of dried dill like I did!)
1/4 red onion chopped very finely
1/2 cucumber, seeds scraped out and chopped
about 100g smoked salmon (or however much you can spare!)

Boil your potatoes for around 15minutes or until soft.

While they're boiling, mix together the sour cream, white wine vinegar, dill and seasonings in a large bowl.

Drain your potatoes and add to the dressing while still warm. Leave to cool while you chop the remaining ingredients.

Once cool, add the cucumber, onion and smoked salmon and mix through until everything is coated nicely in the dressing. Pack up in a Tupperware or two for lunch the next day, or serve with a green salad and a glass of cool white wine for dinner!


Variations


If you have a different combination of ingredients in your fridge or want to try a different potato salad then go for it! Why not swap the smoked salmon for some smoked haddock and go heavy on the black pepper? Or you could easily swap the sour cream for crème fraîche (maybe use a bit less as this tends to be a bit richer) or natural yoghurt, though the red onion works really well with sour cream. And if you're less of a fish fan, then go for some cut up smoked bacon or pancetta instead and swap your dill for some fresh parsley. The opportunities are endless... so Happy Monday... have a lovely week and enjoy!

Monday, 20 January 2014

My first attempt at pasta!


I don't know if anyone else has ever had a go at homemade pasta, but I watch it on TV all the time and it looks so easy I just thought... I may as well give it a go! And I guess it is pretty easy... but only when you know what you're doing! So this is a little bit about my first attempt at pasta - I wouldn't call it a total failure but neither would I call it a success - but practice makes perfect, right?


I was following this recipe (as accurately as I could!) for Spinach and Ricotta Tortellini, which I made in advance and froze for a couple of weeks. Then I roughly followed the recipe for for a Butter, Sage and Pine Nut Sauce, and cooked some of the pasta up tonight for tea!


When making the pasta, I got in a bit of a mess - I always get in a mess when there's flour involved - but I was fairly pleased with the ball of stuff I had that sort of resembled the pasta dough I was aiming for. It was at this point that I realised I didn't have a rolling pin (I now do, as well as a pasta maker, after telling this story to my mum and boyfriend just before Christmas!)


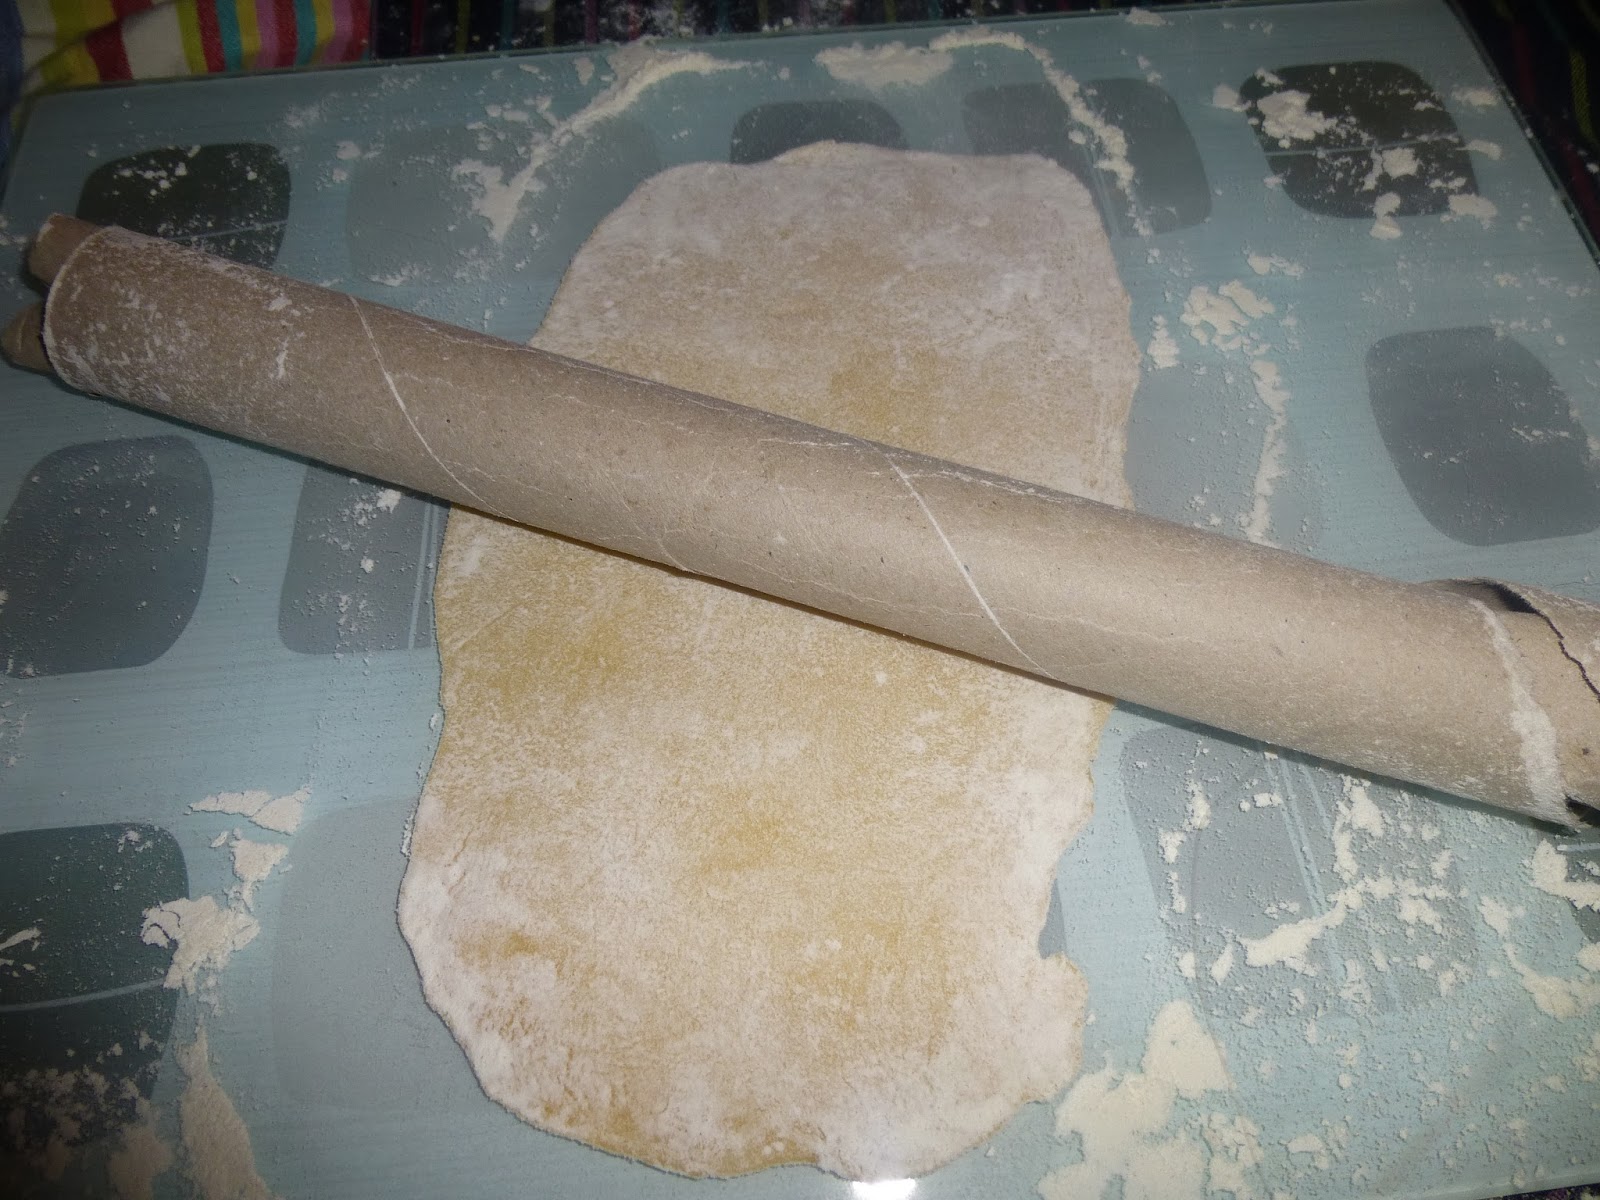
As I was making these around the gift giving period, I improvised with the closest thing I could find to a rolling pin - the cardboard tube from a roll of wrapping paper! Needless to say, the rolling of the pasta was not as smooth or as thin as it should have been and the tortellini was probably ruined from here on... but I'm not a quitter!


The spinach and ricotta filling was fine to make, but spooning it into my little slabs of pasta and trying to not get in even more of a mess was a little trickier! Anyhoo, I managed to make them and then wrapped them individually in cling film to freeze so as not to stick the tortellini together.


Tonight I boiled my little funny-shaped attempts at tortellini and cooked the pine nut, sage and butter sauce and dished it up... and I was pleasantly surprised! For something that could have been a total disaster, it definitely tasted like pasta and the thinner areas around the filling were pretty good! Some of it, admittedly, was too thick and a bit chewy and they were all shapes and sizes... but not bad for a first attempt!


I'll definitely be giving it another go sometime soon, but I will not use a tube of wrapping paper and I will try to have a finished dish that looks little more like tortellini!